Simple 2D fluid effect shader
The first technical aspect of game development I've been fascinated about is particle effects. Generating aesthetically pleasing things with simple elements and simple rules is the kind of stuff that really tickles my inner geek.
I've spent quite a lot of time trying to figure out how to make flames, puffs of smoke, jets of water. What they have in common, and I was missing, was some kind of cohesive look. After some research, I found out good news and bad news. Bad news was that the answer was a pixel shader. Good news was that it's a very simple one.
So let's get stared: as a particle we will be using a regular radial gradient, which goes from fully opaque to fully transparent. The color doesn't matter as we will be applying it with the pixel shader. Something like this:

Now let's put this gradient into a particle effect that just spits out some particles with some degree of randomness in a general direction, let's make them affected by gravity and colliding with solid elements on the scene. The outcome doesn't really look impressive, but bear with me.
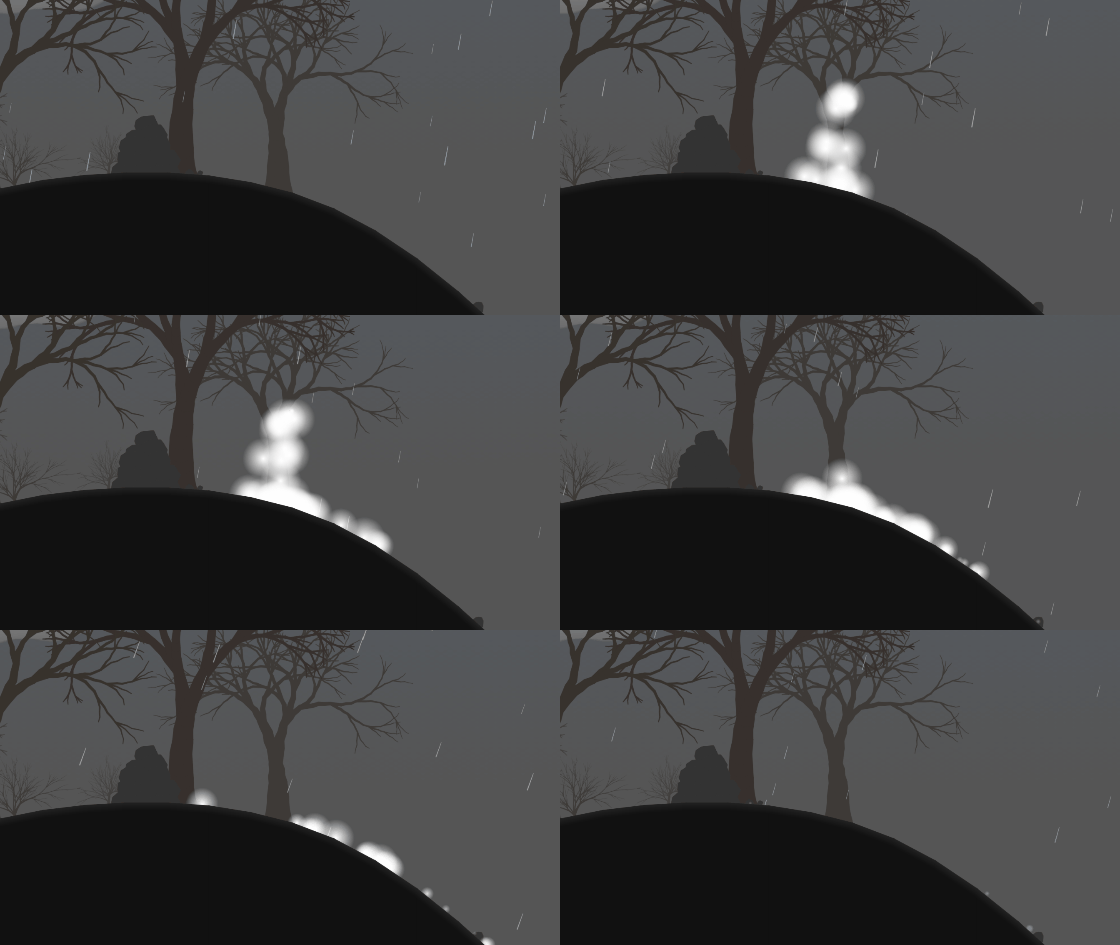
What we need to do is to "meld" these particles together. What we want to achieve is an effect reminiscing of a fluid: nearby particles should stick together, they should completely separate only when they reach a certain distance. It can be summarized with this image: when two "drops" are close we want to see the part inside the blue line filled with color, while the outside parts becomes transparent:
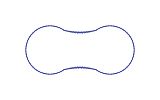
So we want to cut out the parts that are less overlapping and we want to fill the parts that are more overlapping. To obtain that effect, we are going to use a threshold pixel shader, which does exactly that: if the original pixel doesn't reach a certain opacity threshold it will be made fully transparent, if it does it will be made fully colored.
To avoid pixelated borders, we are going to customize the shader a little bit: instead of going from fully transparent to fully colored when crossing the threshold, we will make the pixel gradually less transparent until we hit a second threshold.
Finally we are going to apply the color we want for the effect, in this case I'll use a watery and 50% transparent light blue, hence vec4(0.43, 0.46, 0.5, 0.5)
Without further ado, this is the code for the shader:
precision mediump float;
varying vec2 vTextureCoord;
uniform sampler2D uSampler;

void main() {
    vec4 col = texture2D(uSampler, vec2(vTextureCoord.x, vTextureCoord.y));

    if(col.a > 0.75) {
        // the pixel is above the threshold: apply the color
        col = vec4(0.43, 0.46, 0.5, 0.5);
    }
    else if(col.a > 0.65) {
        // optional: apply the color gradually to avoid pixelated borders
        float colVal = (col.a - 0.65) / 0.1;

        col = vec4(0.43 * colVal, 0.46 * colVal, 0.5 * colVal, 0.5 * colVal);
    }
    else {
        // the pixel is below the threshold: make it transparent
        col = vec4(0.0, 0.0, 0.0, 0.0);
    }

    gl_FragColor = col;
}
It's very simple, but applying it to our unimpressive particle effect makes some kind of sorcery and turns it into something that makes more sense:
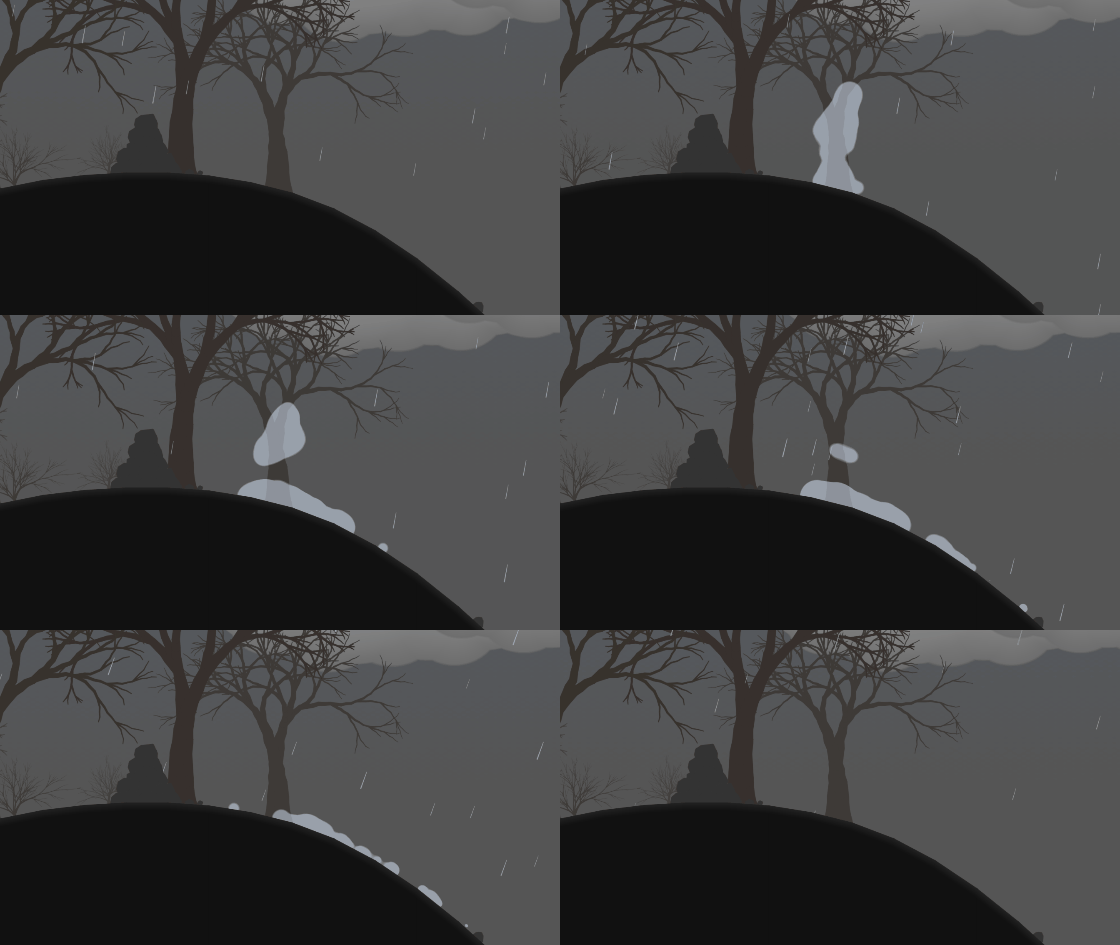
By tinkering with the shader and the particles, you can obtain different effects.
For the next example I've used a particle that goes from 0.25 opacity to fully transparent. The reason is that I want a more cohesive look and a more gradual color application, so I want to be able to check with the shader how much particles are overlapping on a finer scale. The particle effect has a negative value for gravity and shoots in random directions on 360 degrees. Finally I've modified the shader to add multiple thresholds, so I can make color progress gradually from transparent to red and from red to light yellow:
precision mediump float;

varying vec2 vTextureCoord;
varying vec4 vColor;
uniform sampler2D uSampler;

void main() {
    vec4 col = texture2D(uSampler, vec2(vTextureCoord.x, vTextureCoord.y));

    if(col.a > 0.95) {
        // the pixel is above the yellow threshold: make it yellow
        col = vec4(1.0, 0.9, 0.6, 1.0);
    }
    else if(col.a > 0.5) {
        // the pixel is below the yellow threshold and above red threshold: apply a mix of the colors
        float colVal = (col.a - 0.5) / 0.45;

        col = vec4(
            1.0 * colVal + 0.75 * (1.0 - colVal),
            0.9 * colVal + 0.2 * (1.0 - colVal),
            0.6 * colVal + 0.0 * (1.0 - colVal),
            1.0 * colVal + 0.75 * (1.0 - colVal));
    }
    else if(col.a > 0.35) {
        // the pixel is below the red threshold and above the visibile threshold: fade in red
        float colVal = (col.a - 0.35) / 0.15;

        col = vec4(
            0.75 * colVal,
            0.2 * colVal,
            0.0 * colVal,
            0.75 * colVal);
    }
    else {
        // the pixel is below the visibile threshold: make it transparent
       col = vec4(0.0, 0.0, 0.0, 0.0);
    }

    gl_FragColor = col;
}
And this is the result:

Considering how simple the code is, I find it wonderfully useful.
Obviously it's not the only way to achieve such effects, but arguably it's one of the simpler and lighter approaches. For example, I've read about a technique using fully opaque circles as particles, with a blur shader and then a threshold shader. The result would be probably better, but the blur effect adds a bit of load and complexity. This goes all the way up to realistic fluid simulation, which for many developers is high out of their scope.